Issue 029
November -0001
Technique 1: Hip Toss
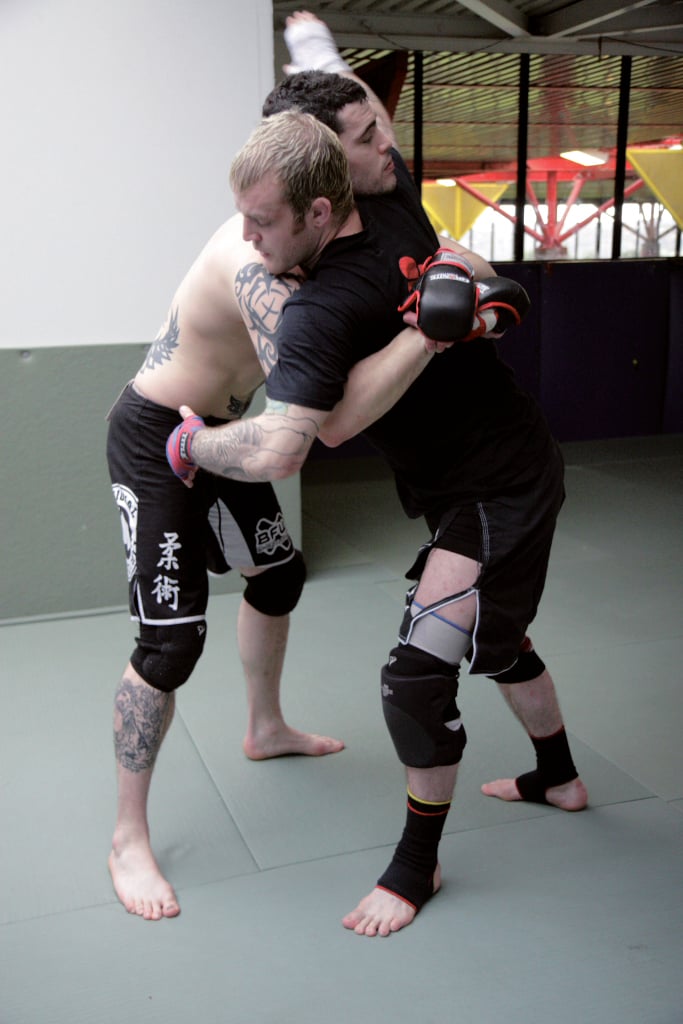
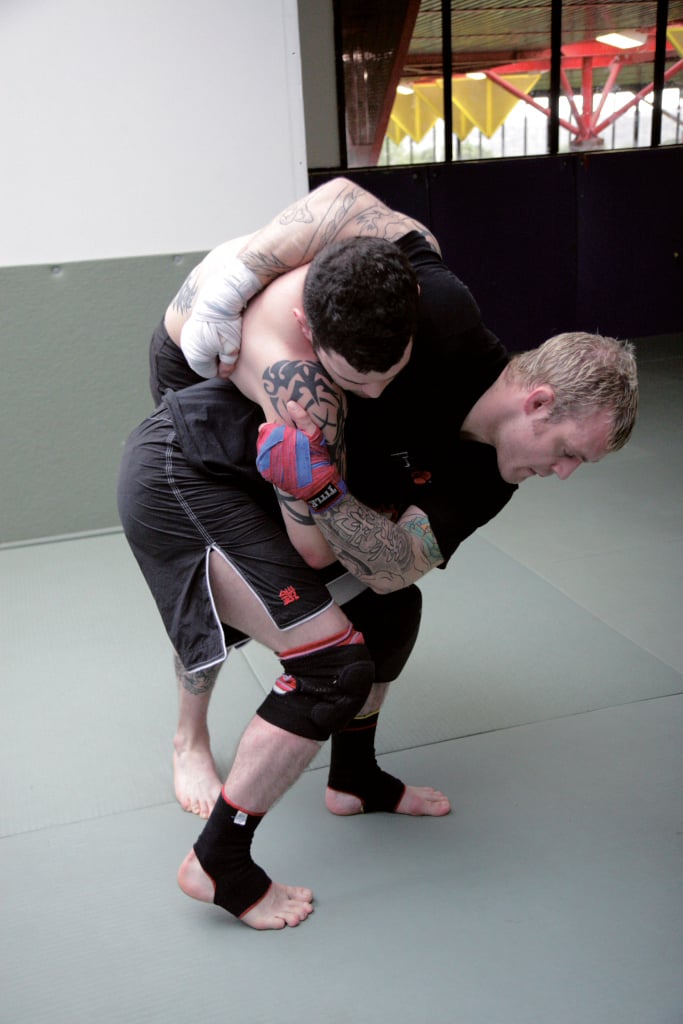
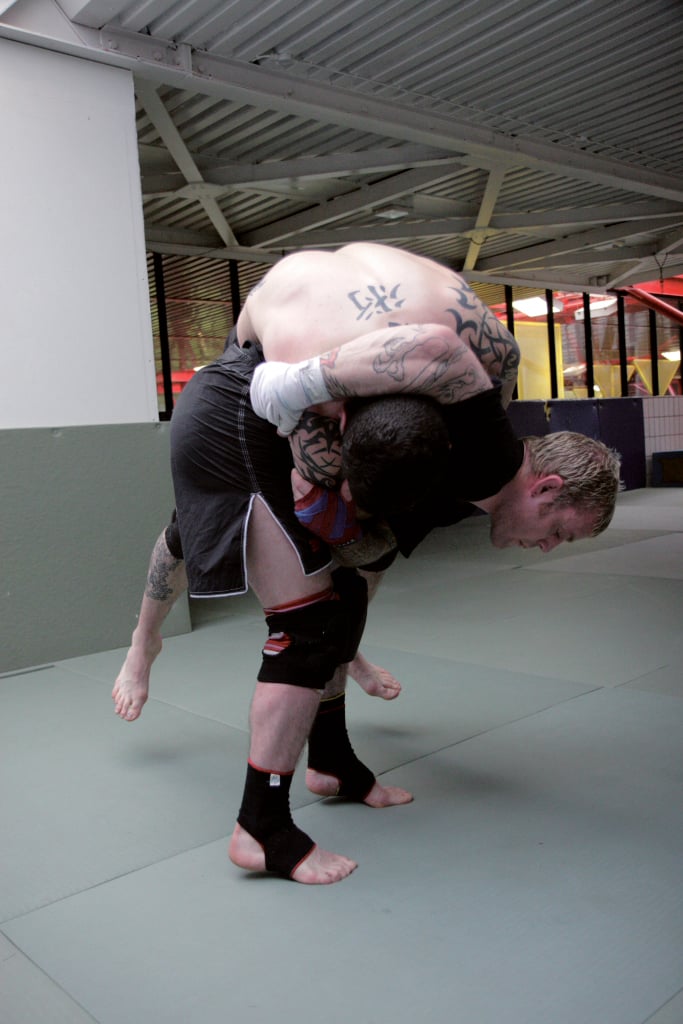
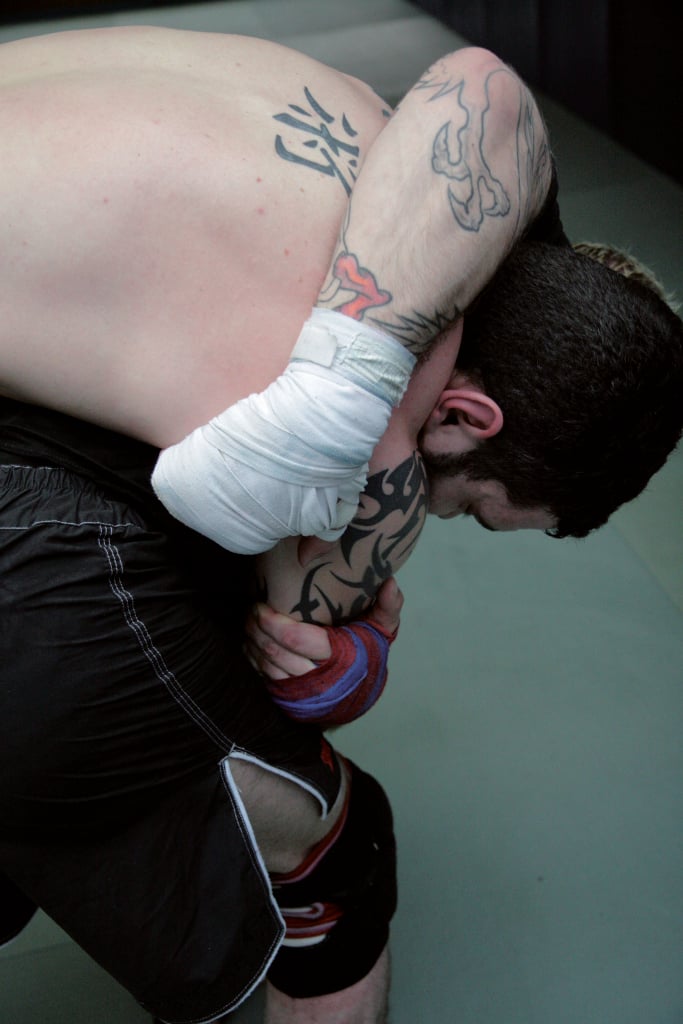
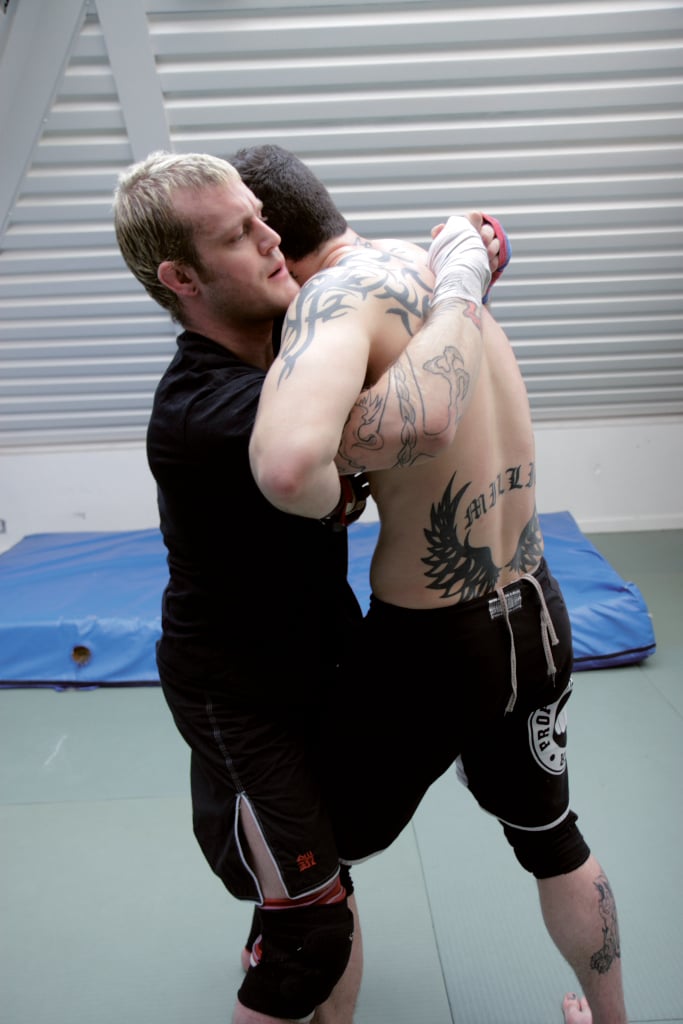
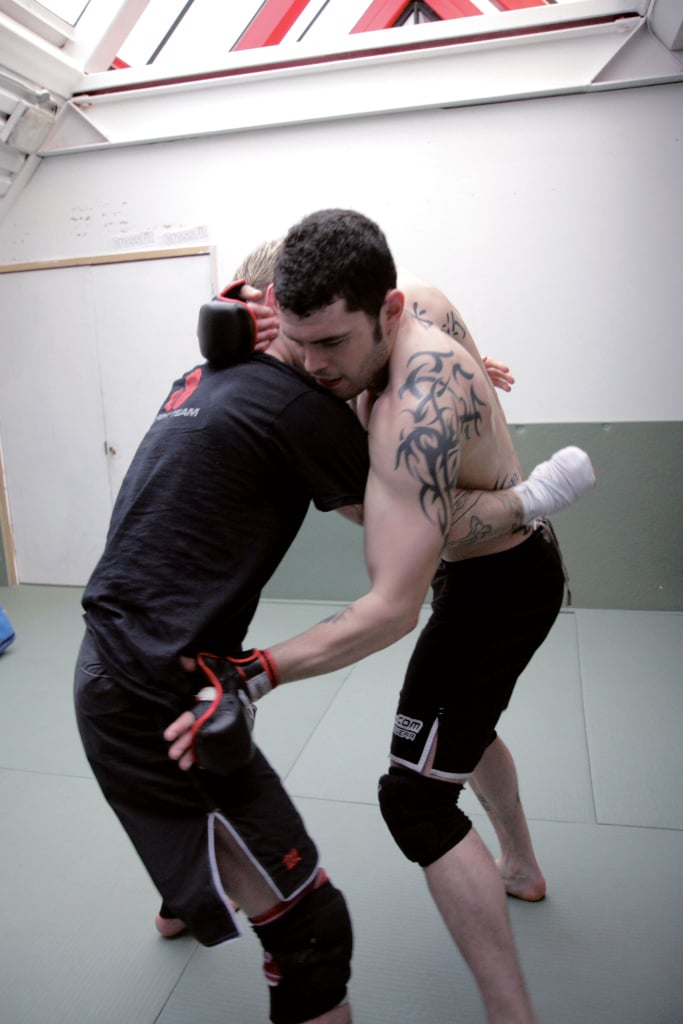
1. Pete throws one of his overhooks up around Richie’s neck and looks away.
2. Pete pulls down on the tricep and continues to drive his other arm across in an over-arm bowling motion.
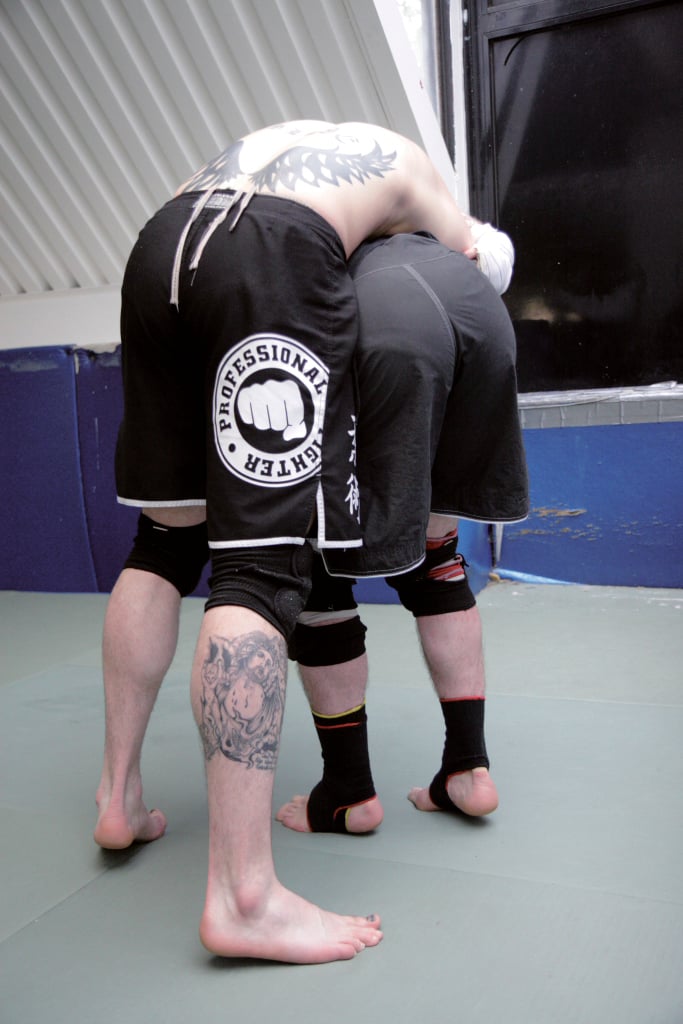
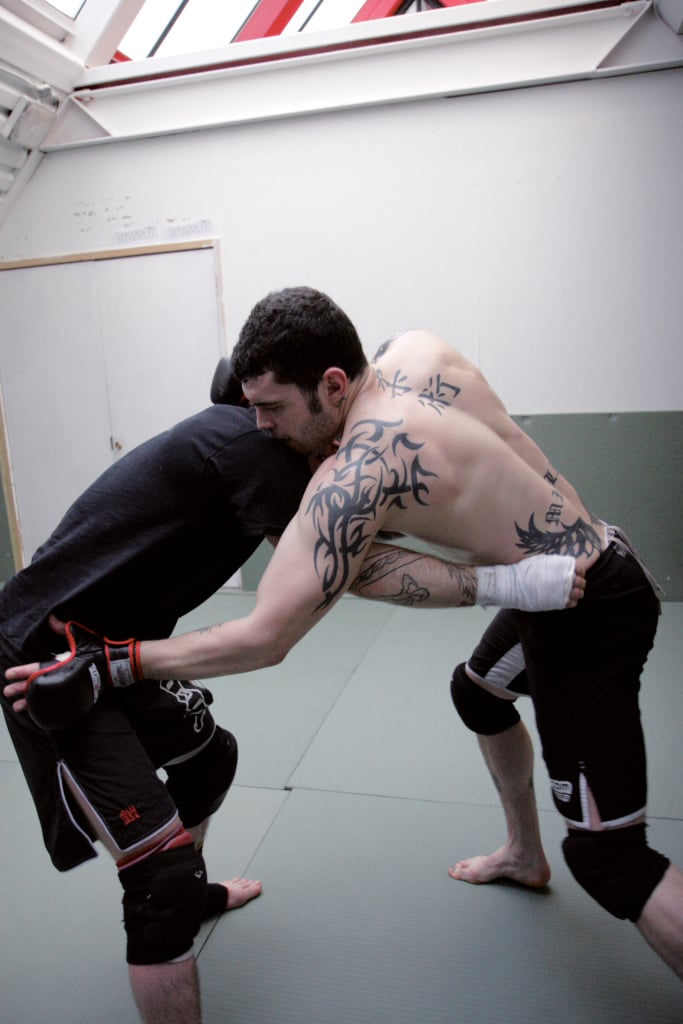
3. Pete starts to twist his lead foot as Richie tries to recover his posture.
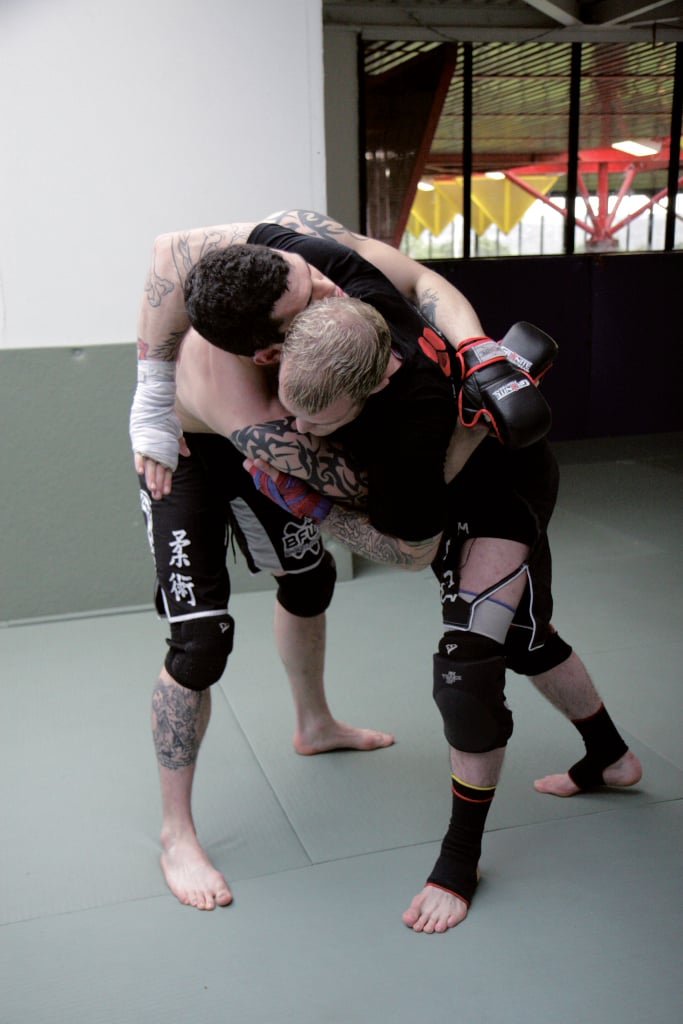
4. Pete steps his trail leg right through and rotates his hips.
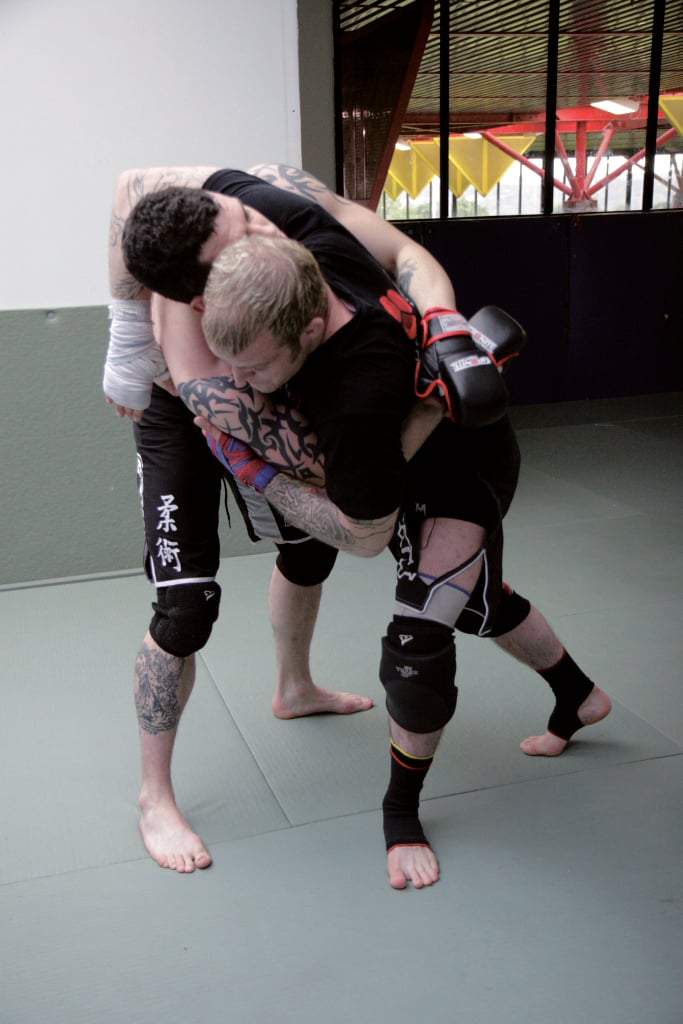
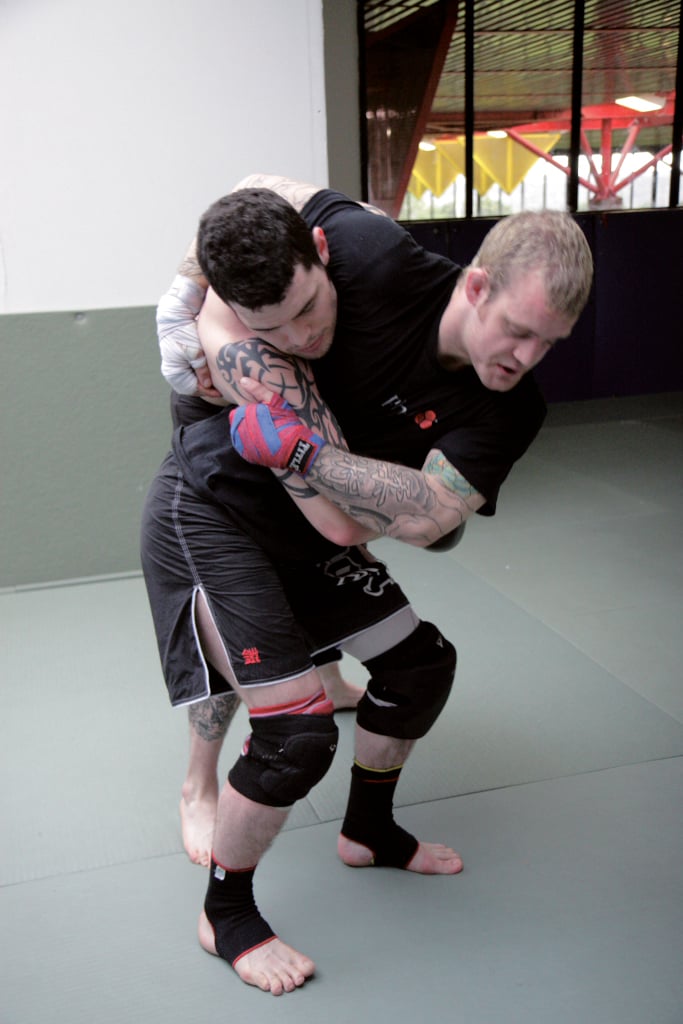
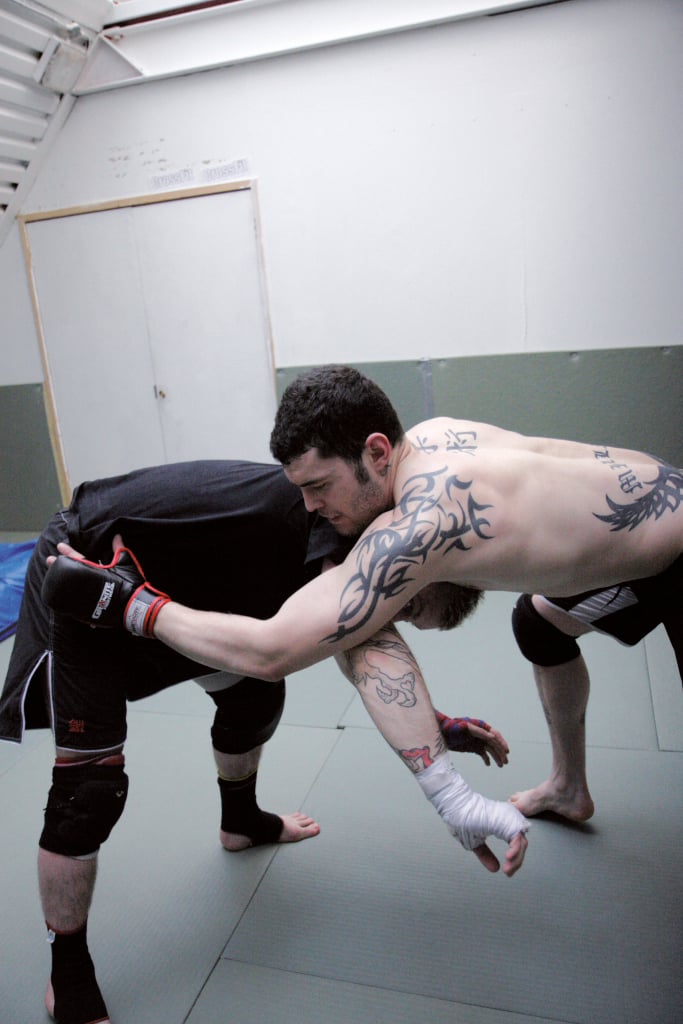
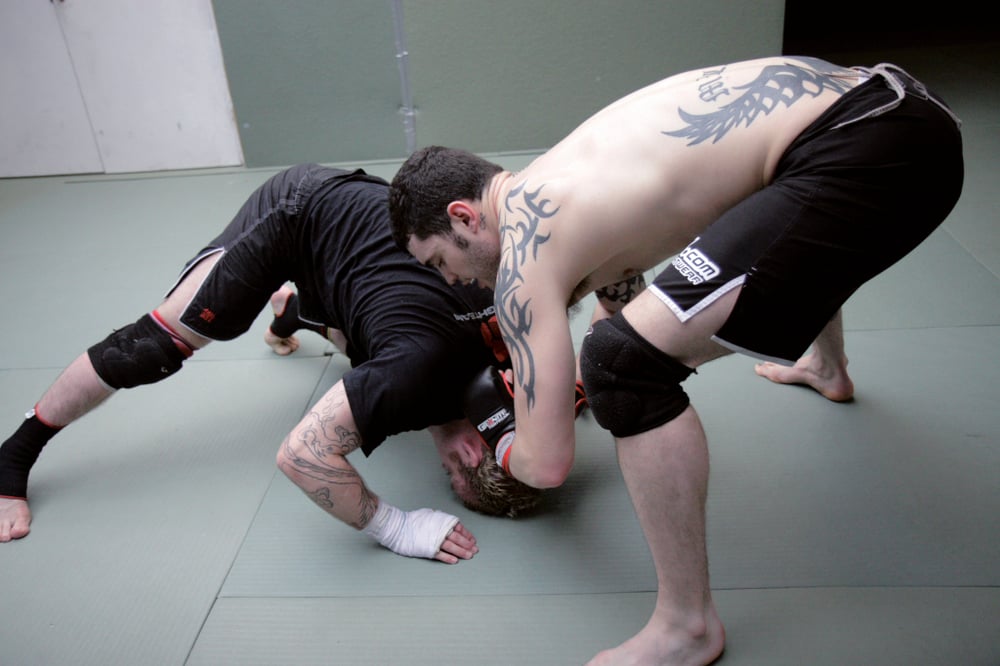
5. As Richie is attempting to recover his position after being pushed laterally, Pete capitalises on the motion Richie has given him and loads Richie’s weight across his back, rotating his hips to direct Richie to the mat.
6. Pete pulls on the tricep and armpit to aid the twisting motion, and drives off his toes to give power and amplititude to the throw.
7. Pete lands in kesa gatame (scarfhold) and must act immediately to stop Richie from continuing the motion and scoring a reversal as he lands.
Hip Toss Pinning Finish
Starting Position
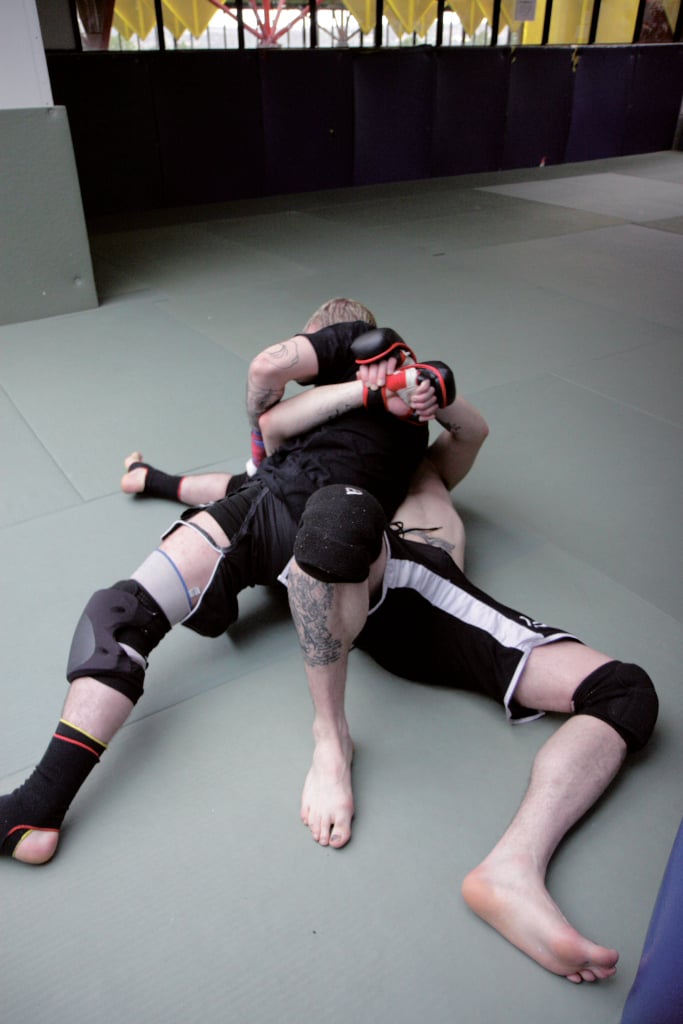
Hip Toss Pinning Finish 1
Here Pete shows how to correctly maintain the kesa gatame hold. He tightens the head and arm hold by holding his own inner thigh and pulling on the tricep. His weight is compressing Richie’s ribs.
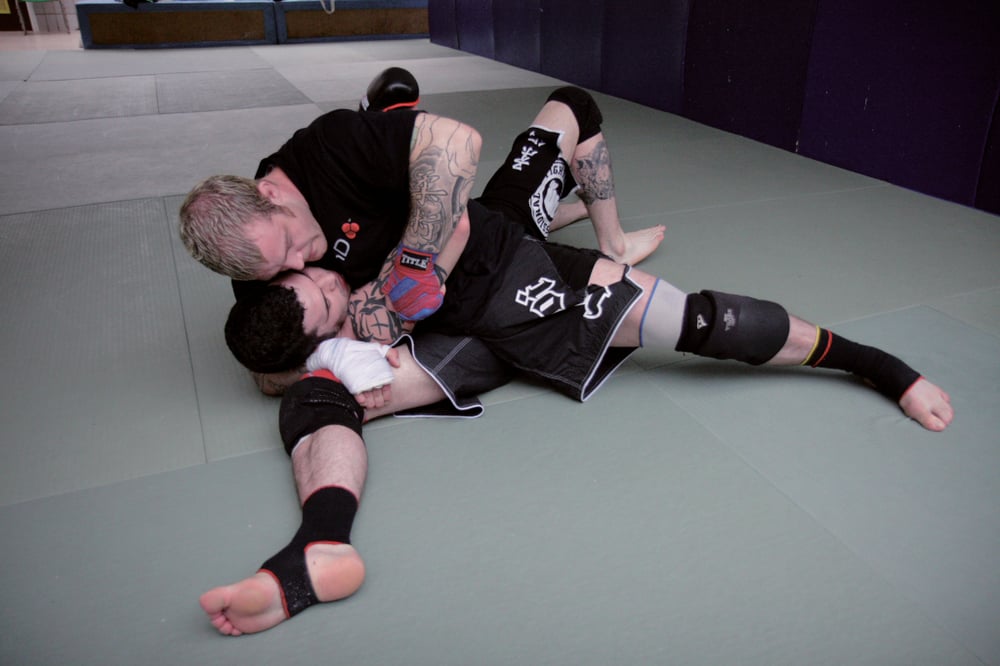
Hip Toss Pinning Finish 2
Because the kesa gatame is an ideal position for Richie to bridge from, especially when continuing the momentum from a hip-toss, Pete reverses the motion by reaching the arm that was controlling the head around the far-side arm, and blocking the near-side hip. The arm that was on the tricep reaches to the opposite side of the head, pressuring the other arm and head together, and walks the legs around the top of the body.
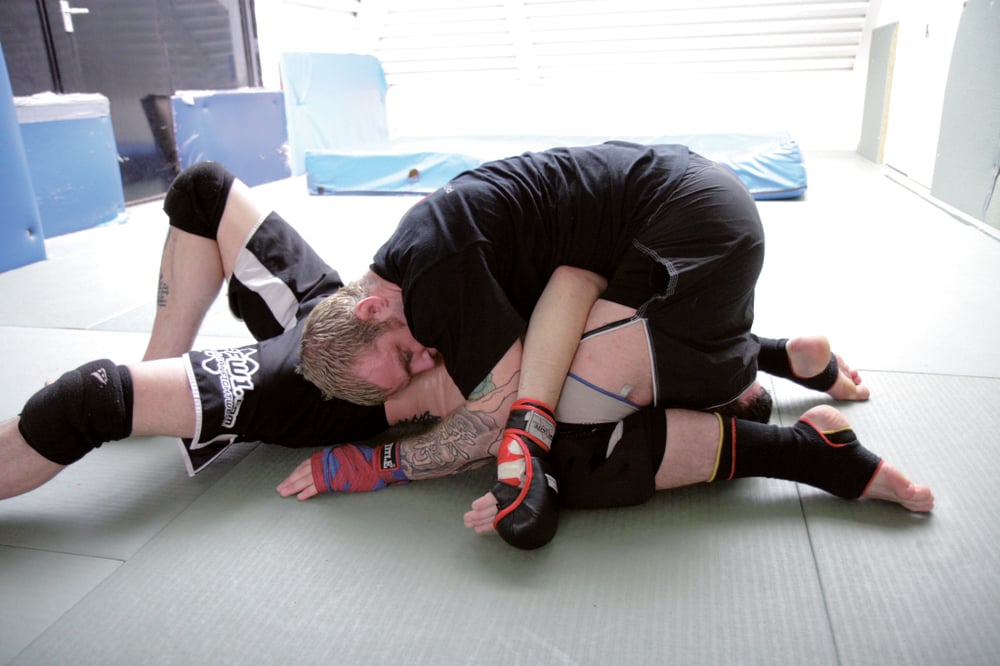
Hip Toss Pinning Finish 3
Pete walks all the way round to ‘north-south’ with short, choppy steps, maintaining tight chest-to-chest positioning and isolating the arms to set up submission attacks.
Position Details
Amplitude detail
Pete springs off the mat, driving up on his toes.
Foot position detail
Both feet are pointing in the same direction and are close together. A common error is to space the legs far apart and point the feet in a natural stance position, then attempt to execute the throw by folding forward at the waist, as opposed to twisting.
Grip detail
Dig the fingers deep into the armpit and flesh of the tricep. For strong grips, use the flesh of your opponent the same way you would use a gi.
Hip position
Note that Pete has turned his hips all the way through, not hip to hip like a judo hip-toss. Without the gi to grip and create friction, it is necessary to load the opponent on to your back, as opposed to your hips.
Technique 2: Hip-hit and twist
1. Pete has achieved double underhooks, Richie has to drive his arms down and punch both fists into Pete’s chest to prevent the underhooks gripping high on the neck.
2. Pete’s foot is close to Richie’s lead leg, Richie reaches around Pete’s head, gripping tight over the ear.
3. Richie hits Pete’s hip hard with an open hand.
4. As he strikes the hip, he simultaneously pulls Pete’s head around, knocking Pete’s lead leg off the mat and planting all his weight on the trail leg.
5. Richie has created distance between his hips and Pete’s.
6. It is likely that Pete will try to get in a low leg shot as he starts to recover his balance.
7. Richie anticipates the shot, sprawls his hips and snaps on the back of the collar…
Hip-hit and twist Finish 1
Directing Pete’s head to the mat and pinning it, ready to strike and separate back to his feet...
Hip-hit and twist Finish 2
Or dig in for a front headlock. Richie feeds his hand through deep under the armpit, and pushes Pete’s elbow inside (image a). Enabling him to lock up the mata leao grip (image b).
Image B
...

