Issue 032
December 2007
Kimura

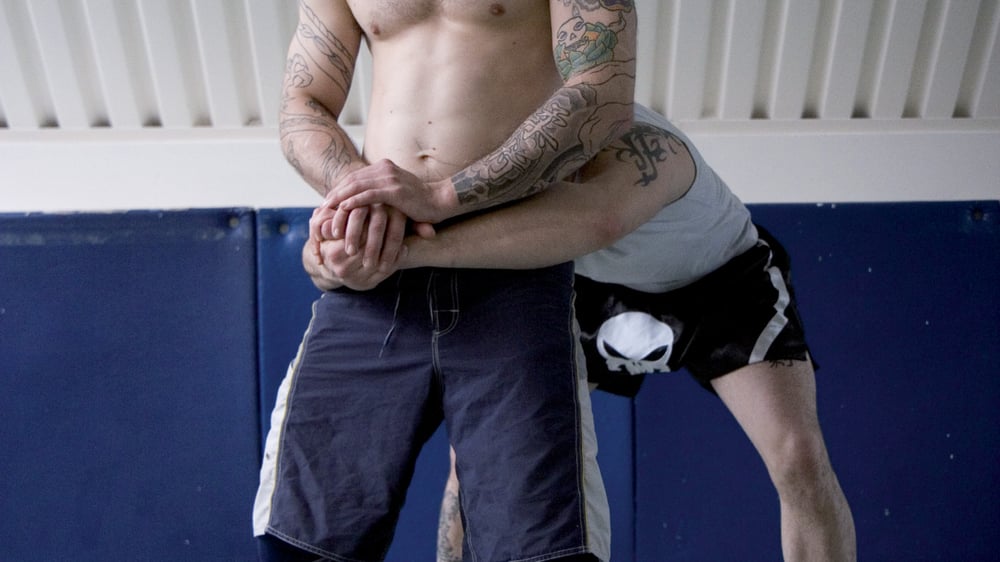
1. Pete is pressuring down with both hands on Richie’s bodylock.
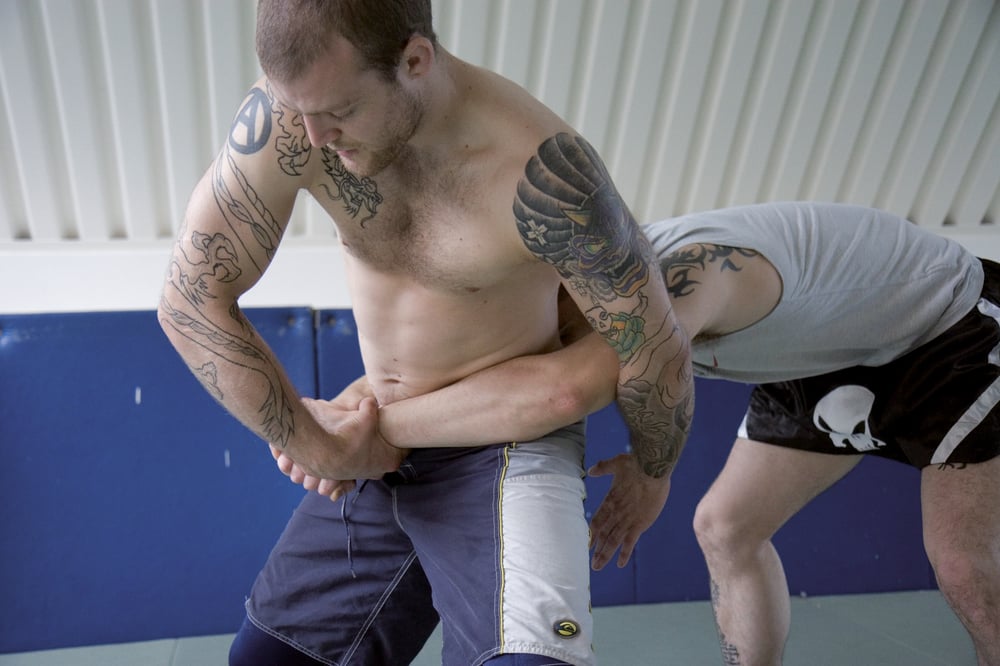
2. Pete leaves one hand on and reaches back, attacking the arm of the hand on top. Note that Pete has his arm bracing just behind Richie’s elbow.
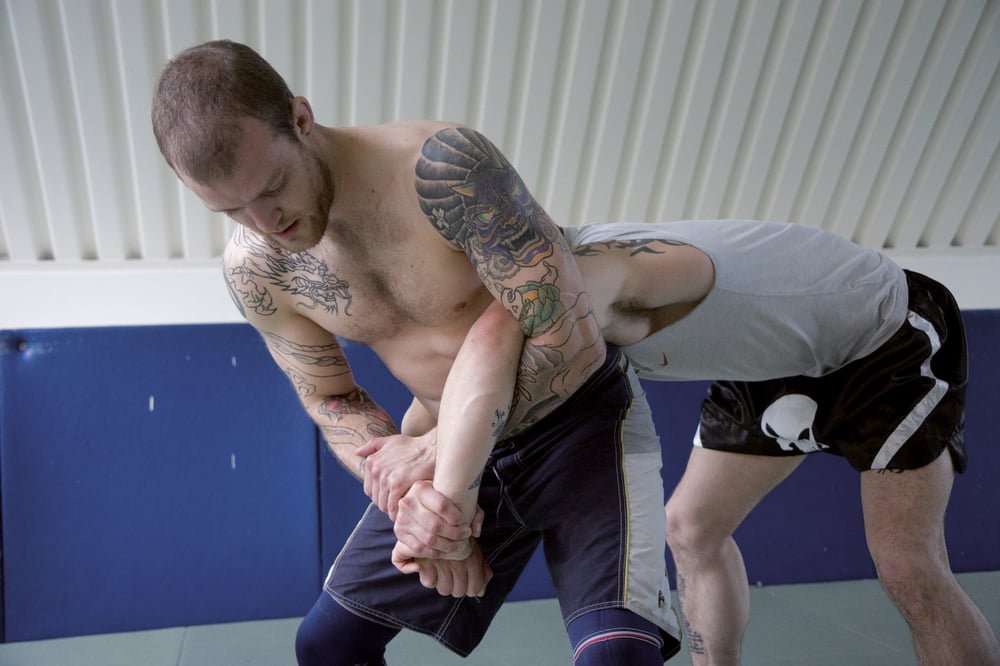
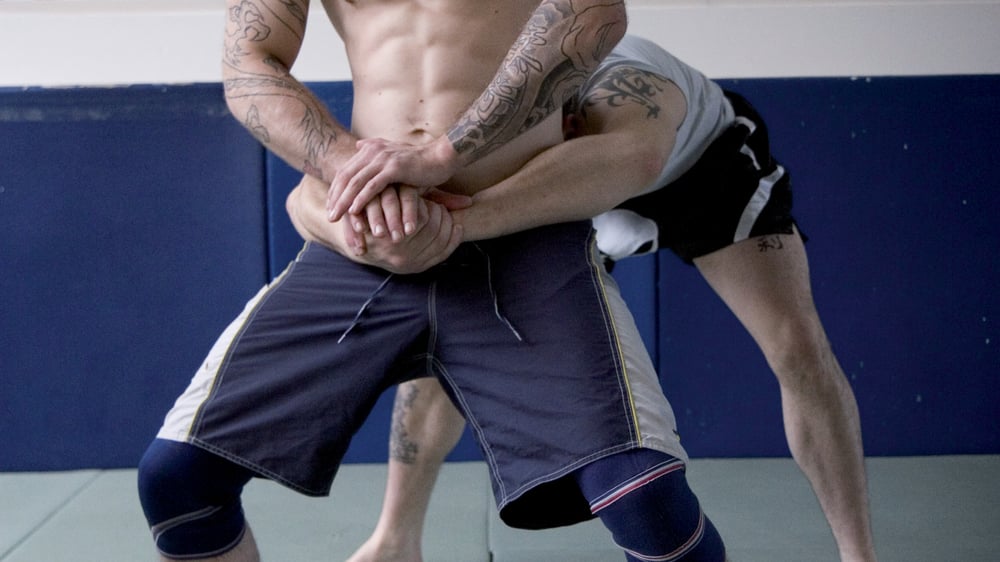
3. Pete twists Richie’s wrist like revving a motorcycle to break the grip and torque the arm. Pete reaches through to close the figure 4 grip on his own wrist.
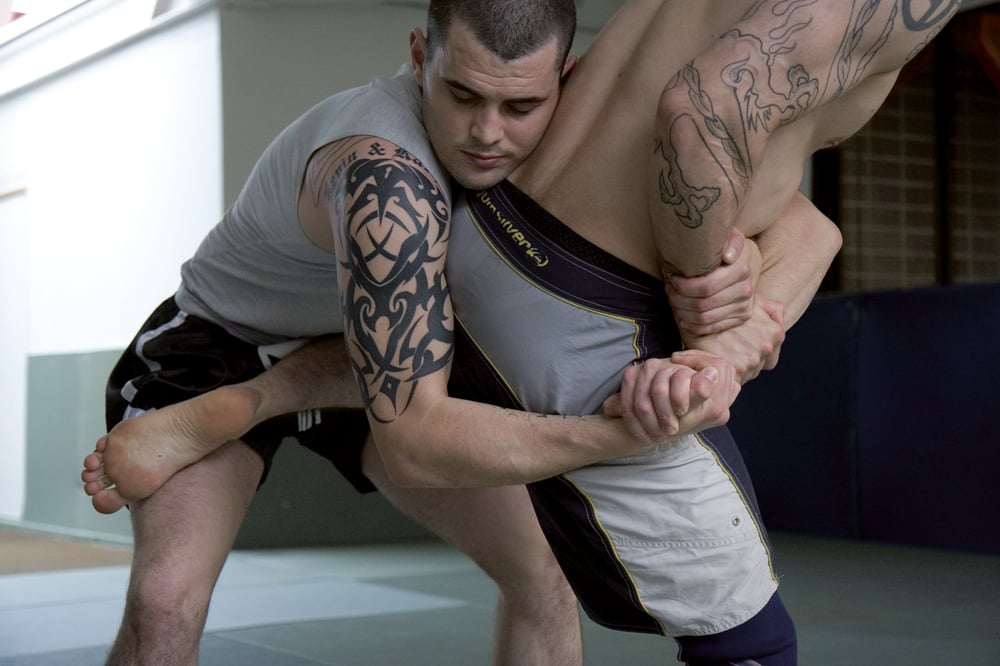
4. Pete turns in toward Richie and kicks his leg either (a) across the waist or (b) through the inner thigh.
5. Pete hops his foot behind Richie’s foot.

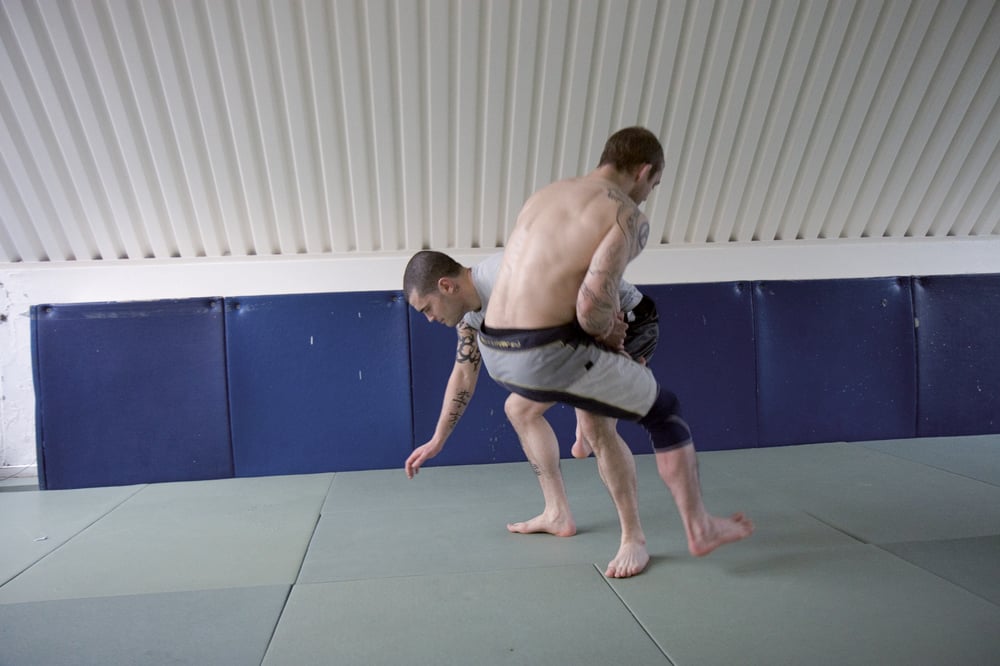
6. As Pete Rolls back he uses the other leg to steer Richie over and to the mat.
7. Pete continues to roll, throwing his leg over the top.

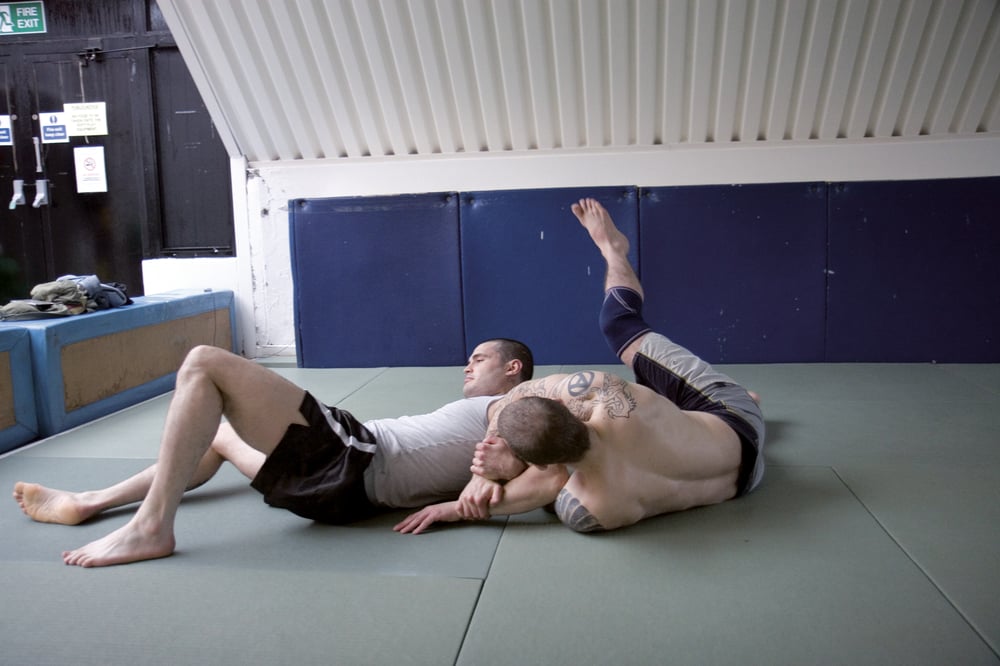
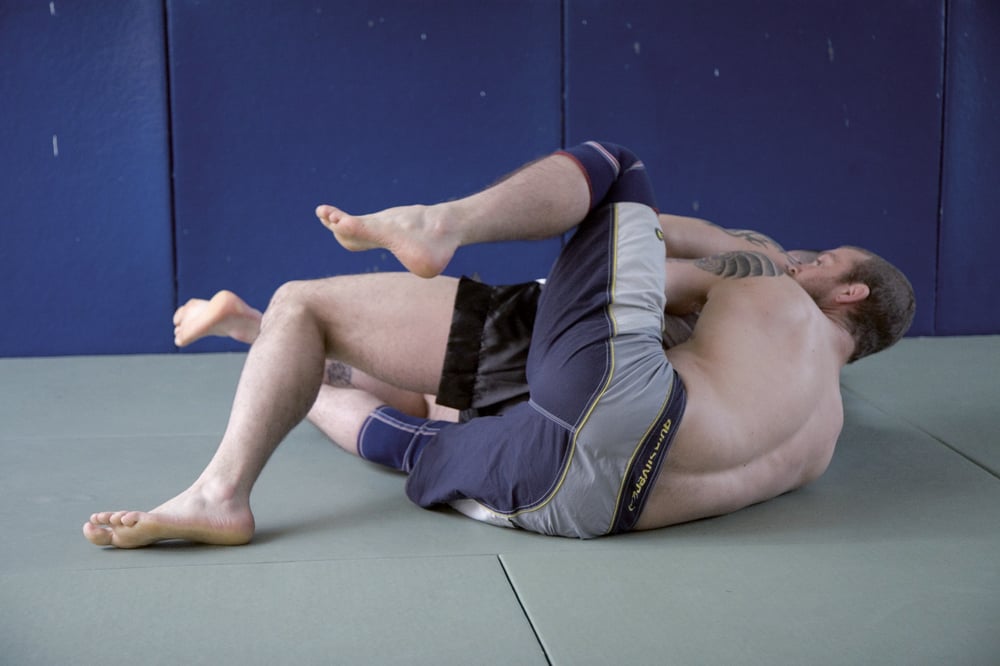
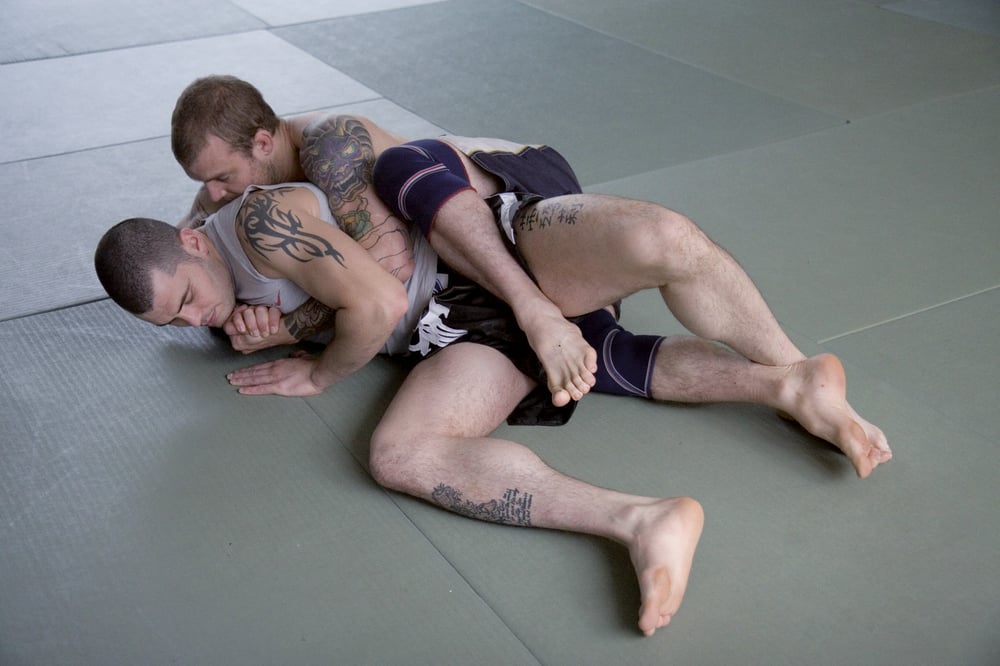
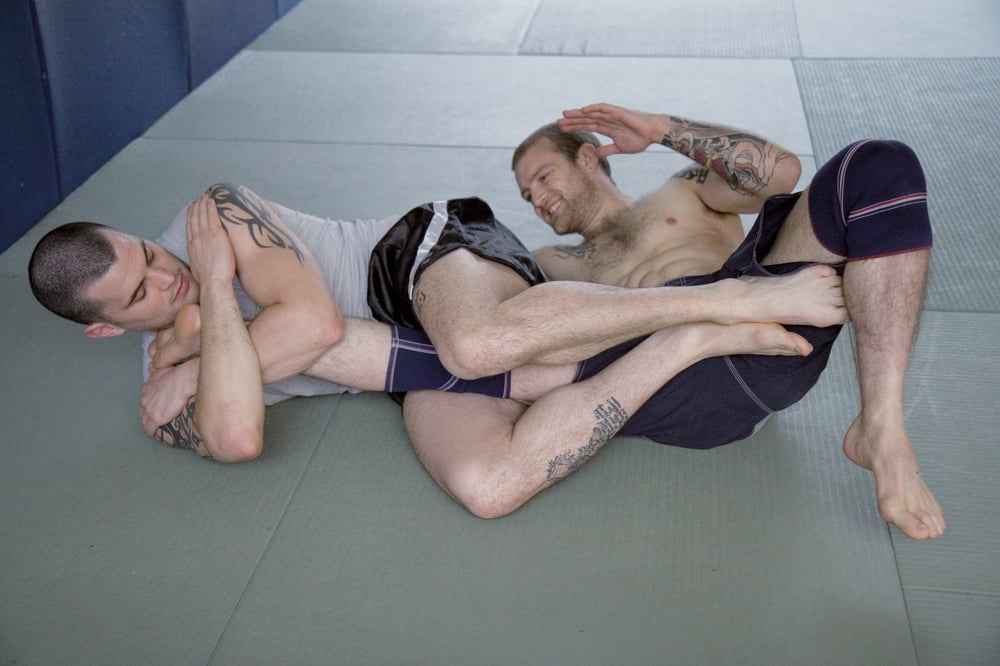
8. Pete traps Richie’s head and arm, with (a) unlocked legs or in (b) a triangle

9. Pete squeezes up the head and drives the figure 4 up Richie’s back to finish

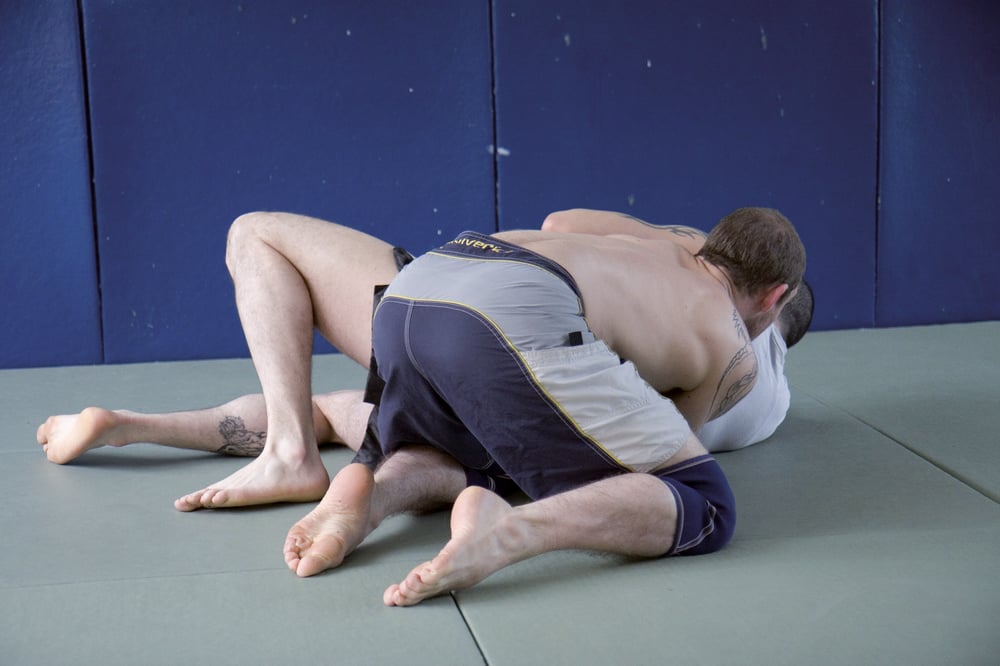
10. Kimura alternative finish. Alternatively Pete can sit through after the roll, and finish the Kimura with all his weight on the locked shoulder.
Suplex defence
1. WRONG! Pete is standing too upright with a narrow base, Richie will lift him easily from this position.
2. RIGHT! Pete has lowered and widened his base without leaning back (which would leave him vulnerable to being snapped backwards to the mat). Note that Pete uses both hands to pressure down on Richie’s bodylock.

3. As Richie jumps in to lift Pete for the Suplex, Pete hooks his foot inside Richie’s leg, preventing him from lifting him over his hips.
Sag Throw

1. WRONG! Pete has tucked his head to the side. Richie can easily chop back with an elbow to Pete’s face and head.

2. Right! Pete has his head in the centre and his legs a little way back, too far away for Richie to roll for the kneebar.

3. The goal of the sag throw is not to pull the man on top of you, but to finish on top. Here Pete steps around Richie, creating the space for him to fall into. Pete props Richie’s far foot with his own foot.

4. Pete keeps his bodylock tight so that Richie is dragged with him to the mat by the force of his bodyweight.
5. Pete escapes his hips to the side so that none of Richie’s weight is loaded on his body....
6. This enables Pete to escape the bottom leg and establish a cross body pin.
7. Sag back. Sag to taking the back. You can take the back directly from the sag if you can establish the harness grip (around the neck and under the arm)
8. Sag kneebarcounter. Do not leave the bottom leg hanging around in the middle –watch out for that kneebar! Pete reads his intentions and threads one leg inside Richie’s leg.
Foot position detail. Noite that Pete wraps and grips Richie’s foot with his own. Pete’s shin is exerting pressure down on the back of Richie’s leg, preventing him from lifting or escaping his leg.
...